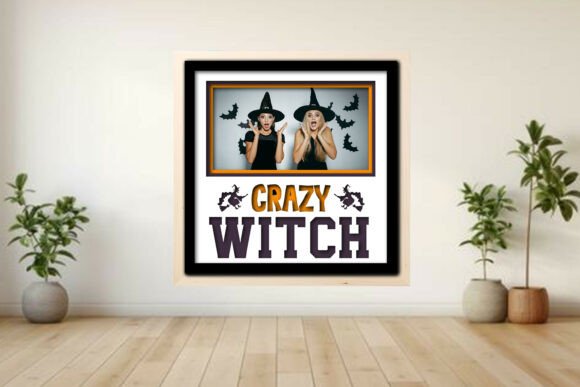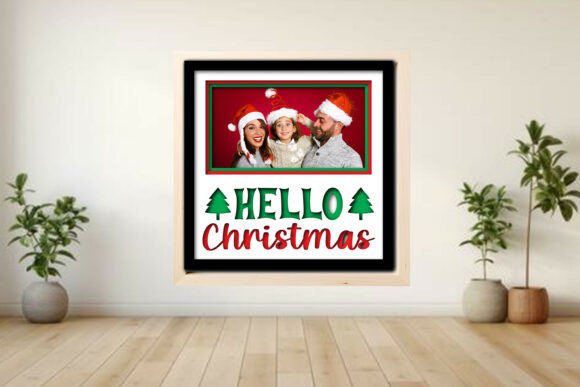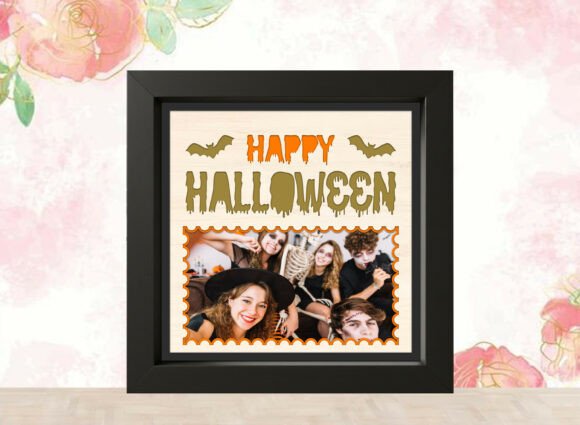
Happy Halloween Picture Frame Layered
There is a distinct charm in crafting holiday decor that bridges the gap between spooky season nostalgia and the cozy anticipation of winter. While the title might suggest a singular focus, the Happy Halloween Picture Frame Layered concept often serves as a gateway to understanding versatile, multi-seasonal shadow box designs. This specific project type allows creators to swap thematic elements, transforming a haunted house silhouette into a festive Christmas scene with minimal effort. By utilizing a layered shadow box approach, you create depth and visual interest that flat prints simply cannot achieve.
This design is not just about cutting shapes; it is about curating memories. Whether you are displaying photos from Christmases past or capturing the fun of a Halloween party, the structural integrity of the frame remains constant while the aesthetic narrative changes. For those using machines like Glowforge®, xTool®, OMTech, Cricut®, or Silhouette®, this project offers a perfect balance of simplicity and sophistication. It is an ideal entry point for beginners yet robust enough for professionals looking to streamline their holiday product lines.
Why Layered Designs Matter for Different Creators
The appeal of a layered picture frame varies significantly depending on who is holding the weeding tool. For a beginner hobbyist, the primary concern is often ease of use and the likelihood of success. A pre-designed layered project removes the guesswork from spacing and alignment. The included SVG, DXF, PDF, EPS, and PNG files ensure that regardless of your software preference, you can start cutting immediately. The optional score and engrave lines further simplify the process, guiding you to fold or mark areas without needing advanced design skills.
Conversely, a small business owner or entrepreneur views this project through the lens of scalability and commercial value. The ability to choose from 1, 2, 3, or 6 photo layouts means you can offer customized products at different price points. A single-photo frame might serve as an affordable gift item, while a six-photo collage becomes a premium heirloom piece. The fully scalable nature of the design allows you to adjust dimensions to fit standard frame sizes you may already have in stock, reducing material waste and inventory complexity.
Adapting the Design for Seasonal Versatility
One of the most compelling features of this project is its adaptability. While the base structure supports the "Happy Halloween Picture Frame Layered" theme, the separate layers for backer, frame mat, and accents like trees and stars make it equally suitable for Christmas. This duality is crucial for educators and community workshop leaders who need projects that resonate with diverse groups throughout the year. Teaching students how to layer materials for a 3D effect during October provides them with the technical skills to create Christmas decor in December.
For marketers and bloggers, this versatility offers rich content opportunities. You can document the transformation process, showing how changing the accent colors from orange and black to red and green completely alters the mood. This type of content engages audiences who are interested in DIY sustainability—buying one digital file and using it multiple times rather than purchasing new templates for every holiday.
Technical Considerations and Material Choices
To achieve the best results with your laser cutter or die-cutting machine, material selection is key. Cardstock works well for the intricate details of the "MERRY" and "christmas" text accents, while thicker chipboard or wood veneer provides stability for the backer and frame mat. If you are using a Cricut® or Silhouette®, ensure your blade is sharp to handle the fine cuts of the tree and star accents. For laser users on Glowforge® or xTool® machines, adjusting power and speed settings for each layer ensures clean edges without charring, which is essential for a polished final presentation.
The inclusion of an LBRN2 project file is a significant benefit for LightBurn users, offering a streamlined workflow that preserves layer organization. This attention to file compatibility demonstrates a respect for the user’s time and technical environment, whether they are a freelancer working against a tight deadline or a publisher creating instructional content.
Practical Applications for Various Audiences
- Home Decor Enthusiasts: Use the 3-photo layout to create a timeline of family holidays, mixing Halloween costumes with Christmas morning smiles. The layered depth adds a museum-quality feel to personal displays.
- Etsy Sellers: Offer customization services where clients can upload their own photos. The scalable design means you can accommodate various aspect ratios, making your listing more attractive to potential buyers.
- Teachers: Incorporate this project into art lessons focusing on perspective and layering. Students can learn about spatial relationships by assembling the backer, mat, and accents in the correct order.
- Gift Givers: A handmade frame carries emotional weight. By selecting specific photos and assembling the layers with care, you create a unique gift that reflects thoughtfulness and effort.
Assembly Tips for a Professional Finish
Assembly is straightforward but requires patience. Start by organizing your cut pieces by layer. Use acid-free adhesive or double-sided tape to secure the backer board. When attaching the frame mat, ensure it is centered to maintain uniform borders around the photo openings. For the 3D effect, consider using foam tape between certain layers, particularly behind the "MERRY" text or tree accents, to lift them slightly off the background. This subtle elevation catches light differently, enhancing the visual impact.
If you are new to shadow boxes, start with the 1-photo layout to master the alignment before tackling the more complex 6-photo versions. The simple assembly guide PDF included with the project provides step-by-step visuals, but remembering to dry-fit all pieces before gluing can save you from costly mistakes. This practice is valuable for professionals who need consistency across multiple units and beginners who want to build confidence.
Evaluating the Project for Your Needs
Before downloading, consider your primary goal. If you seek creative expression, focus on experimenting with different paper textures and colors for the accents. If your priority is efficiency, stick to the provided score lines and standard cardstock weights. For those interested in learning value, take the time to understand how each layer contributes to the overall depth, perhaps modifying the star positions or tree sizes to create a custom variant.
The Happy Halloween Picture Frame Layered design is more than a seasonal craft; it is a flexible template for memory keeping. Its compatibility with major cutting platforms ensures accessibility, while its layered structure offers a tactile quality that digital screens lack. Whether you are decorating your home, building a product line, or teaching a class, this project provides a solid foundation for creative success. By understanding the different ways various audiences can leverage its features, you can maximize both the enjoyment and utility of your crafting time.