Valentine’s Day Boards Laser Cut Bundle: A Guide to Flawless 3D Decor
Crafting heartfelt home décor for the season of love requires more than just enthusiasm; it demands precision, patience, and the right digital assets. The Valentine’s Day Boards Laser Cut Bundle has emerged as a popular resource for makers looking to create intricate, layered wall art or kitchen accents. However, diving into laser cutting without understanding the nuances of file compatibility and machine settings can lead to wasted materials and frustration. This guide explores how to maximize the potential of these designs while avoiding common pitfalls that often trip up both beginners and seasoned crafters.
Understanding the Design Complexity
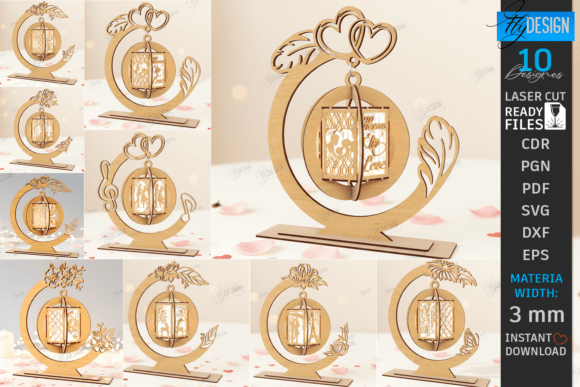
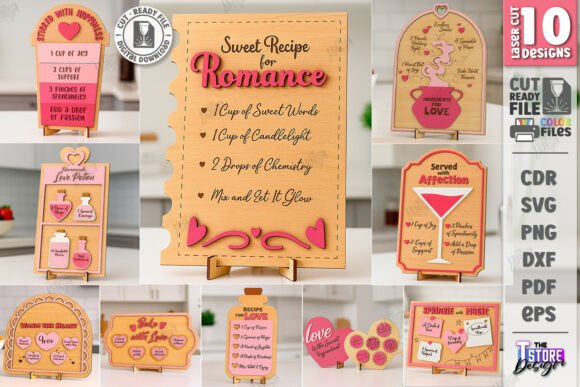
Unlike simple two-dimensional cutouts, this bundle is designed for 3D decorative boards. This means the final product relies on layering multiple pieces to create depth and visual interest. The "Recipe for Love" theme suggests a cozy, kitchen-friendly aesthetic, making these pieces ideal for culinary spaces or dining areas. When you download the archive, you are not just getting a single image; you are receiving a comprehensive toolkit including SVG, EPS, PNG, PDF, and DXF formats. Each format serves a specific purpose, and choosing the wrong one can compromise the integrity of your cut.
Many users mistakenly assume that all vector files behave identically across different software platforms. This is a critical misunderstanding. For instance, while SVG files are widely supported, they can sometimes suffer from scaling issues or node distortion when imported into certain CAM (Computer-Aided Manufacturing) programs. Recognizing these differences early saves time and ensures your layers align perfectly during assembly.
The Critical Role of File Formats
One of the most frequent errors occurs during the import phase. The bundle provides five distinct file types, yet many users default to SVG without considering their specific software environment. If you are using LightBurn, a popular choice for laser operators, you may encounter dimensional distortions with SVG files. This happens because SVGs can interpret units differently depending on the creating software, leading to parts that are slightly too large or small to fit together.
To avoid this, experienced users recommend utilizing the DXF file format when working with LightBurn. DXF files tend to maintain stricter geometric fidelity, ensuring that the dimensions remain true to the original design. This small adjustment in workflow can be the difference between a seamless assembly and a project where layers do not stack correctly. Always verify your dimensions after importing, regardless of the file type chosen.
Decoding the Color-Coded Instructions
Laser cutting files often use color coding to distinguish between different operations, but overlooking this detail is a common mistake. In this bundle, the instructions are clear: RED lines indicate CUT paths, while BLACK lines indicate ENGRAVE areas. Ignoring this distinction can result in a machine attempting to engrave through the material or cut along decorative text, ruining the piece.
Before sending any job to your laser cutter, take a moment to review the layer properties in your software. Ensure that the red lines are assigned to cutting parameters (higher power, slower speed) and black lines are set for engraving (lower power, higher speed). Some software may automatically assign colors to specific tools, but manual verification is always safer. This step prevents costly material waste and ensures the textual elements of the "Recipe for Love" design are crisp and legible rather than burned through.
Material Selection and Machine Compatibility
While the digital files are optimized for laser cutting machines, not all lasers are created equal. Users must ensure their hardware is compatible with the complexity of these designs. Intricate 3D layers require precise kerf compensation—the amount of material removed by the laser beam. If your machine has significant beam width variability, the tight tolerances of the interlocking parts may fail.
Additionally, consider the material thickness. These designs are typically calibrated for standard plywood or MDF sheets, often around 3mm to 5mm. Using material that is too thick can prevent layers from sitting flush, while material that is too thin may lack structural integrity. Always perform a test cut on a scrap piece of the same material to fine-tune your power and speed settings before committing to the final board.
Customization and Support
A major advantage of purchasing digital bundles like this is the potential for customization. However, users often hesitate to reach out when they need adjustments. If you require a different file type not included in the zip archive, or if you need PNG files in specific colors or sizes for printing references, do not hesitate to contact the creator. Many designers are willing to accommodate reasonable requests, enhancing the utility of the product for your specific needs.
Furthermore, if you encounter any ambiguities in the design or have questions about assembly, sending a message can clarify doubts quickly. This direct line of communication is invaluable, especially for complex 3D projects where a small misunderstanding can halt progress. Engaging with the seller also helps you stay updated on future releases, allowing you to build a library of complementary designs for your home décor portfolio.
Best Practices for Assembly
Once the cutting is complete, the assembly process begins. A common oversight here is rushing the gluing stage. Because these boards rely on layered depth, applying too much adhesive can cause swelling or misalignment. Use a minimal amount of wood glue or a precision applicator to secure each layer. Allow sufficient drying time between steps if necessary, and use clamps or weights to ensure the layers bond flatly.
Consider the finish as well. Sanding the edges lightly after cutting can remove char marks and improve the aesthetic appeal. Painting or staining the individual layers before assembly can also create striking contrast, highlighting the 3D effect of the design. This extra effort transforms a simple laser-cut object into a professional-grade piece of home décor.
Making an Informed Decision
Before downloading and starting your project, evaluate your current skill level and equipment capabilities. If you are new to 3D laser projects, start by reviewing the DXF files in your software to understand the layer structure. Check that your machine is calibrated and that you have the appropriate materials on hand. By approaching the Valentine’s Day Boards Laser Cut Bundle with preparation and attention to detail, you ensure a satisfying creative experience.
Remember, the goal is to create something beautiful and meaningful. Taking the time to understand the technical requirements—such as file format selection, color-coded operations, and material compatibility—empowers you to produce high-quality results. Whether you are crafting for your own kitchen or creating items for sale, these practices will enhance both efficiency and satisfaction. Follow the designer’s shop to keep an eye on future releases, and enjoy the process of bringing digital designs to life in the physical world.