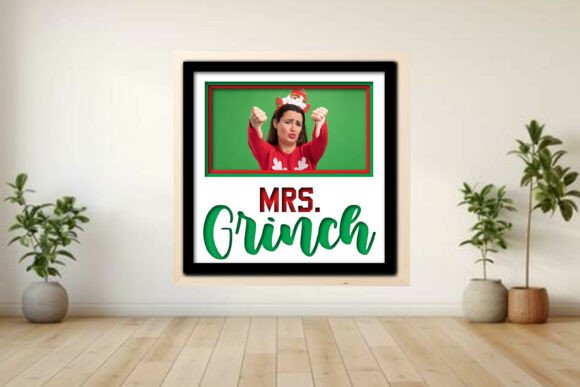
Crafting a Mrs. Grinch Photo Frame Shadow Box for Holiday Memories
The holiday season often brings a whirlwind of activity, from gift shopping to hosting gatherings, leaving little time for personal creative projects. Yet, there is a distinct satisfaction in creating something tangible that captures the spirit of the season. The Mrs. Grinch Photo Frame Shadow project offers a delightful intersection of pop culture nostalgia and personalized decor. It transforms the classic Grinch narrative by introducing his partner, adding a layer of warmth and whimsy to your Christmas display. This isn’t just another ornament; it is a structured, layered shadow box designed to hold cherished memories from Christmases past, present, and future.
For makers using laser cutters like Glowforge®, xTool®, or OMTech, or even those relying on blade cutters like Cricut® and Silhouette®, this digital download provides a versatile foundation. The design leverages layered materials to create depth, turning a flat piece of wood or cardstock into a three-dimensional scene. Whether you are a seasoned entrepreneur looking to expand your holiday product line or a hobbyist wanting to gift something unique to family, understanding how to effectively utilize this design can elevate your crafting output significantly.
Why Layered Shadow Boxes Resonate with Modern Makers
Shadow boxes have seen a resurgence in popularity because they offer a sophisticated way to display photographs without the clutter of traditional albums. The Mrs. Grinch Photo Frame Shadow capitalizes on this trend by combining functional photo display with artistic flair. The layered design creates a visual hierarchy, drawing the eye inward toward the photograph while the surrounding elements—such as the "Santa squad," tree, and star accents—provide context and charm.
From a practical standpoint, layered designs are forgiving. If one layer has a minor imperfection, the depth of the box often hides it from casual view. This makes the project accessible for beginners who might be nervous about achieving perfection on their first try. Furthermore, the ability to choose from 1, 2, 3, or 6 photo layouts means the frame can adapt to different types of memories. A single large photo might highlight a favorite family portrait, while a six-photo layout could tell the story of a holiday party through a collage of candid moments.
Real-World Applications for Different Users
The versatility of this SVG and DXF file set means it serves various users across different contexts. Here is how different creators can integrate this project into their workflows.
For Small Business Owners and Etsy Sellers
If you run an online store specializing in handmade goods, holiday inventory is crucial. The Mrs. Grinch Photo Frame Shadow is an excellent candidate for premium pricing due to its complexity and emotional appeal. Unlike simple coasters or keychains, a shadow box is perceived as a high-value decor item. You can offer customization options, such as staining the wood in different finishes or adding personalized names to the backer layer. Because the files include separate layers for the backer, frame mat, and accents, you can efficiently batch-produce components. Consider offering a "kit" version where customers receive the pre-cut pieces and assemble it themselves, which reduces your labor time while still providing a engaging experience for the buyer.
For Educators and Community Workshop Leaders
Teachers and workshop leaders often seek projects that teach multiple skills simultaneously. This project introduces participants to vector file management, material layering, and basic assembly techniques. For a high school art class or a community center holiday workshop, the Mrs. Grinch Photo Frame Shadow serves as a lesson in composition and depth. Instructors can use the color-coded lines in the LightBurn file (red for cut, blue for score, black for engrave) to teach students how to prepare files for laser cutting. The assembly process also reinforces fine motor skills and attention to detail, making it suitable for older children and teenagers under supervision.
For Hobbyists and Home Decor Enthusiasts
For the everyday creator, this project is a way to personalize home decor without needing advanced carpentry skills. You might use it to create a dedicated "memory wall" in your living room or hallway. The charm of the Grinch theme adds a playful touch that appeals to both adults and children. Since the design is fully scalable, you can adjust it to fit standard photo sizes you already have on hand, or resize it to fit a specific nook on your mantle. Using 3mm plywood gives the frame a rustic, sturdy feel, but you could also experiment with acrylic for a modern, translucent look, provided you test your machine settings first.
Technical Considerations and Material Choices
Before diving into production, it is essential to understand the technical requirements of the Mrs. Grinch Photo Frame Shadow files. The download includes SVG, DXF, PDF, EPS, PNG, and LBRN2 formats, ensuring compatibility with a wide range of software and hardware. However, the success of the final product depends heavily on your preparation and material selection.
Material Testing is Non-Negotiable: While the project is tested on 3mm plywood, every machine behaves differently. Factors such as lens cleanliness, air assist, and material density can alter cut quality. Always run a small test piece to determine the optimal power and speed settings for your specific device. If the cuts are not clean, the layers will not stack flush, ruining the 3D effect.
Understanding the File Layers: The included LBRN2 file for LightBurn users is particularly valuable because it is color-coded. Red lines indicate where the laser should cut through the material, blue lines indicate scoring or folding lines (if using cardstock or thin wood), and black areas are for engraving. If you are using a different software, ensure you map these colors correctly to the appropriate tools. Misinterpreting a score line as a cut line can result in fragile pieces that break during assembly.
Assembly Tips: The simple assembly guide PDF included in the download is a roadmap, but having the right adhesives matters. Wood glue works well for plywood layers, allowing for slight adjustments before it sets. For faster bonding, especially if you are producing multiple units, a cyanoacrylate (super glue) gel can be effective. Ensure each layer is perfectly aligned before the glue dries; using clamps or heavy books can help maintain pressure and prevent warping.
Maximizing the Emotional Impact of Your Creation
The true value of the Mrs. Grinch Photo Frame Shadow lies in its ability to evoke emotion. The Grinch character is universally recognized, but pairing him with Mrs. Grinch softens the narrative, focusing on companionship and holiday joy rather than mischief alone. When selecting photos for the frame, consider images that reflect connection and warmth. A photo of a family gathering, a couple’s holiday trip, or even a pet dressed in festive attire fits the theme perfectly.
This project also serves as a conversation starter. Guests visiting your home will likely notice the intricate layering and the familiar characters, prompting stories about your crafting process or the memories captured in the photos. For entrepreneurs, this emotional connection is a powerful marketing tool. Highlighting the "storytelling" aspect of the frame in your product descriptions can resonate more deeply with buyers than simply listing dimensions and materials.
Final Thoughts on Crafting with Purpose
In a world saturated with mass-produced decor, taking the time to create a Mrs. Grinch Photo Frame Shadow stands out. It represents a blend of technical skill and heartfelt intention. Whether you are selling these frames to support your business, teaching others how to make them, or simply enjoying the process of creation for your own home, the outcome is a lasting tribute to the holiday season. Remember to respect the digital nature of the product—no physical items are shipped, so the creativity and execution rely entirely on you. By paying attention to detail, testing your materials, and choosing meaningful photos, you transform a digital file into a tangible keepsake that can be cherished for years to come.